
-
Modelers Alliance has updated the forum software on our website. We have migrated all post, content and user accounts but we could not migrate the passwords.
This requires that you manually reset your password.
Please click here, http://modelersalliance.org/forums/login to go to logon page and use the "Forgot your Password" option.
You are using an out of date browser. It may not display this or other websites correctly.
You should upgrade or use an alternative browser.
You should upgrade or use an alternative browser.
An unlikely escort
- Thread starter chrispisme
- Start date
chrispisme
Well-known member
Thanks guys
Still pushing ahead.
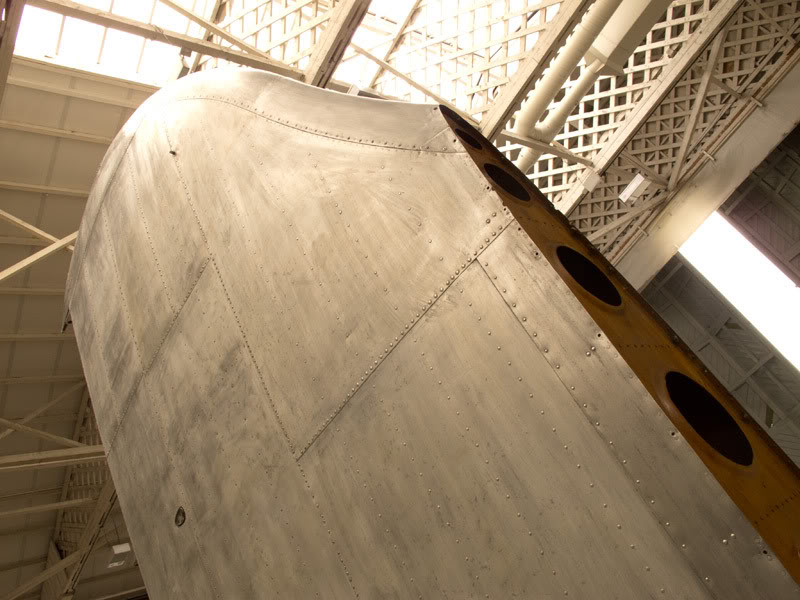
Those reference pics are going to be useful when it comes to the broken off horizontal stab, got any of the rudder?
I've found a couple of pics of the rudder structure and damage, the book illustration doesn't quite show the damage but with the text of the book indicating the tail was fairly well wrecked I imagine the rudder was shredded as well...Just a note here, I'm not putting the fatally injured crewman in the tail turret. I may fog the windows or something, not sure yet.
Still pushing ahead.
Those reference pics are going to be useful when it comes to the broken off horizontal stab, got any of the rudder?
I've found a couple of pics of the rudder structure and damage, the book illustration doesn't quite show the damage but with the text of the book indicating the tail was fairly well wrecked I imagine the rudder was shredded as well...Just a note here, I'm not putting the fatally injured crewman in the tail turret. I may fog the windows or something, not sure yet.
Skinny_Mike
Well-known member
Heavens Eagle
Well-known member
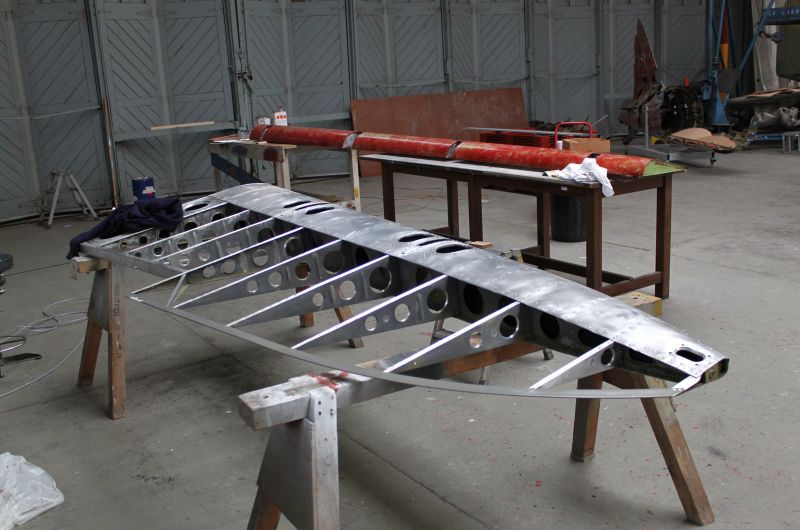
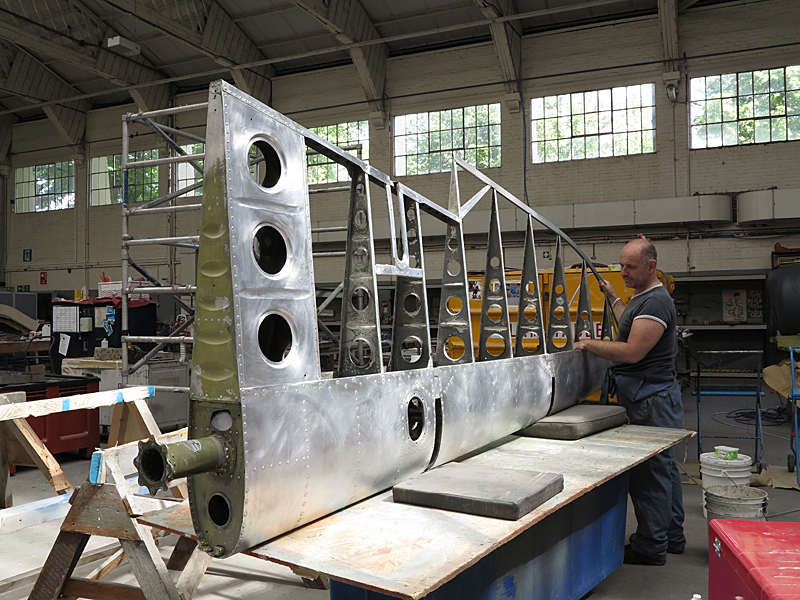
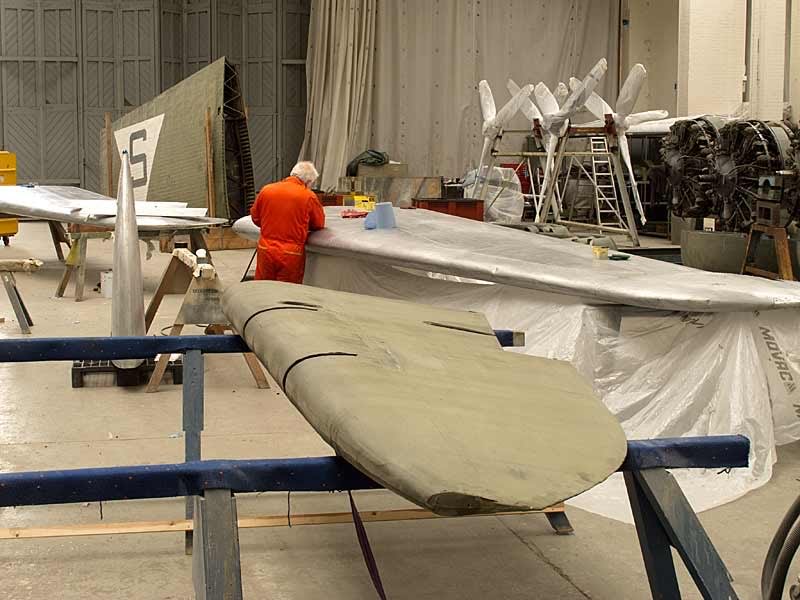
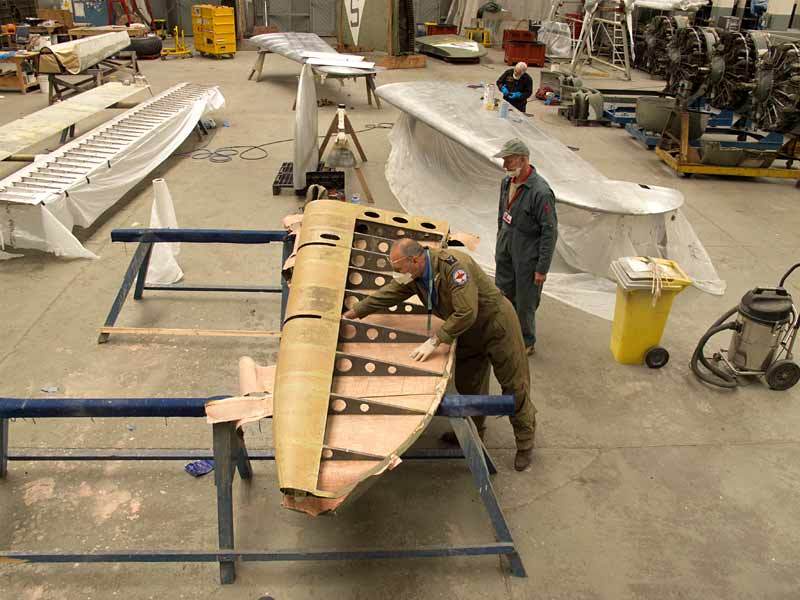
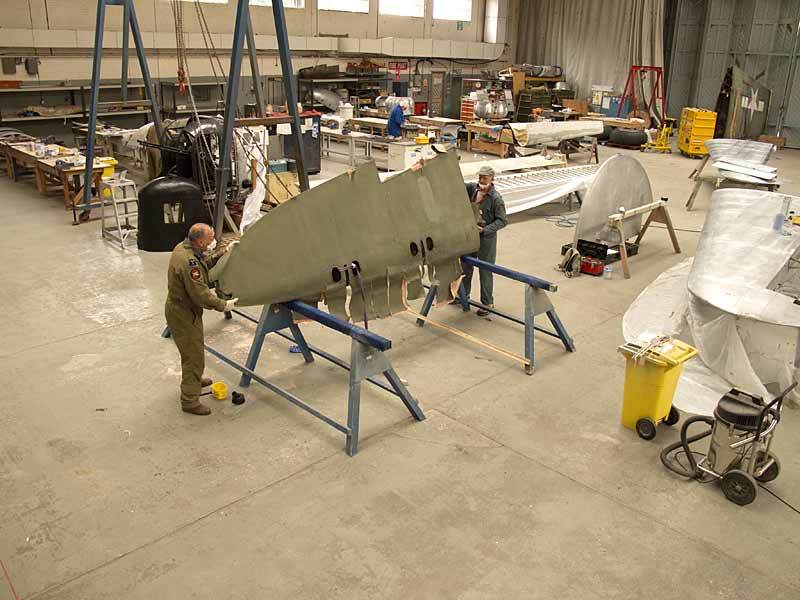
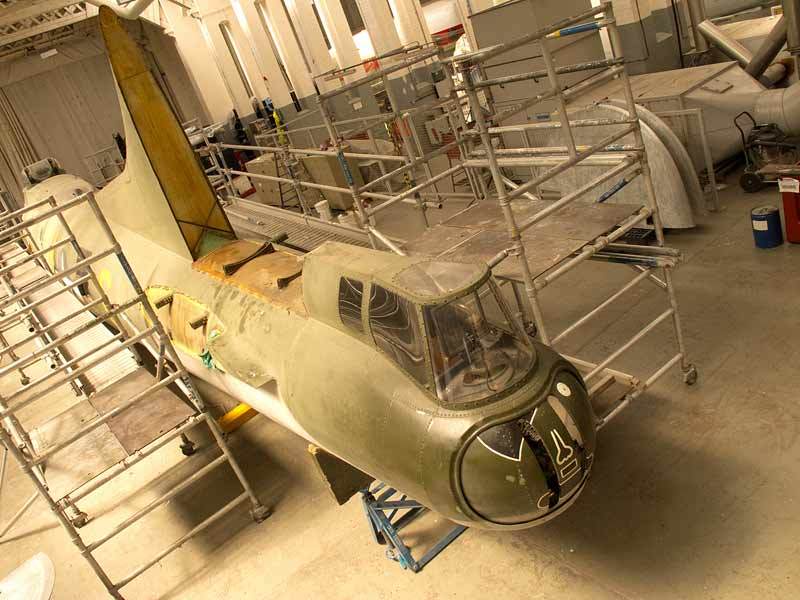
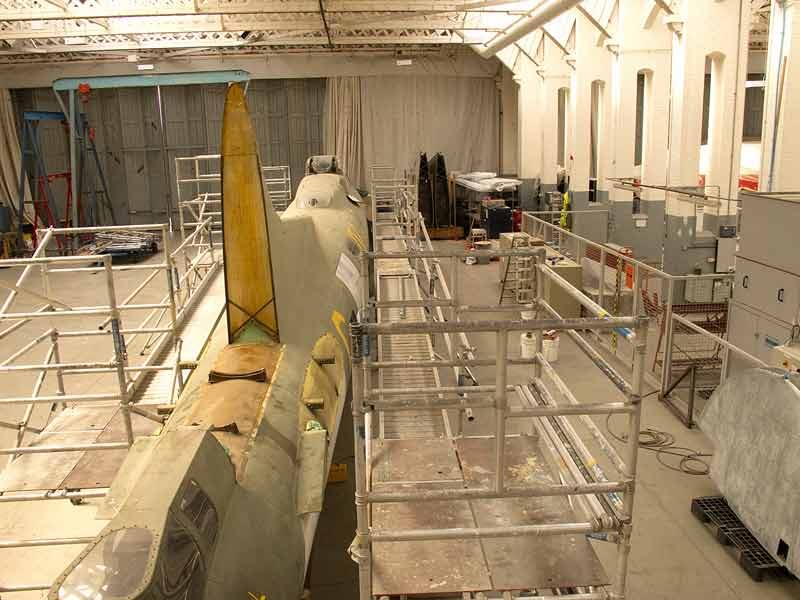
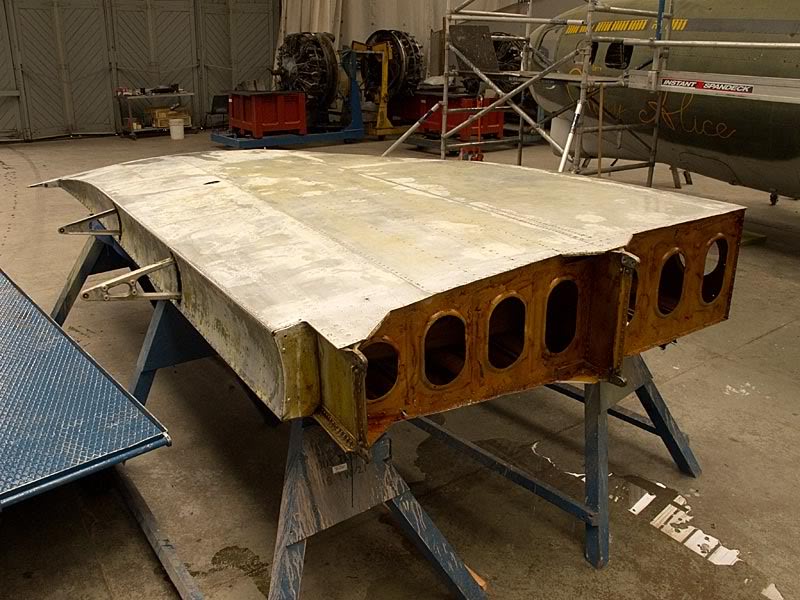
Rudder and vertical stabilizer pics as requested.


chrispisme
Well-known member
whoooooo!
very nice!
Thank you!!
very nice!
Thank you!!
chrispisme
Well-known member
Thanks a lot! very appreciated!
I've taken a break from drilling and grinding to do a little building.
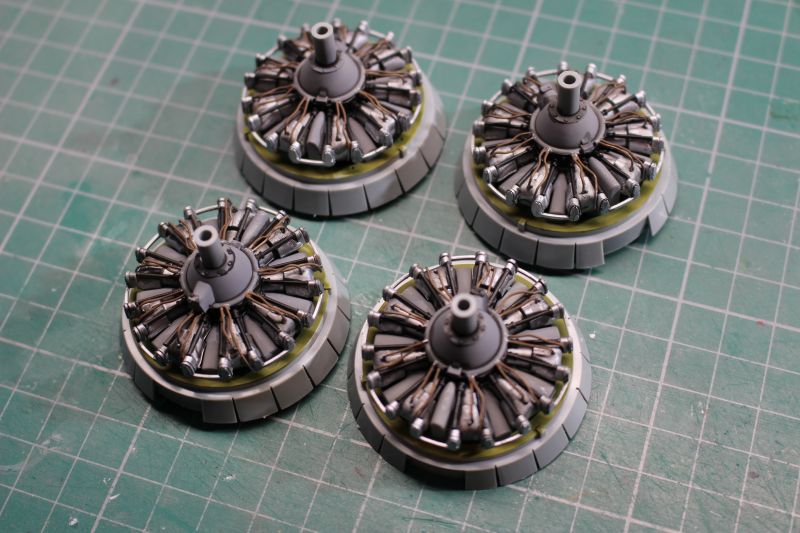
Adding ignition leads to the engines was the only detail work added, but that's a lot of wire!
over a foot of .015" lead wire! I think I'm seeing double now!!
Thanks for looking
I've taken a break from drilling and grinding to do a little building.
Adding ignition leads to the engines was the only detail work added, but that's a lot of wire!
over a foot of .015" lead wire! I think I'm seeing double now!!
Thanks for looking
Job well done 
Skinny_Mike
Well-known member
Engines look nice! Well done

chrispisme
Well-known member
Thanks very much!
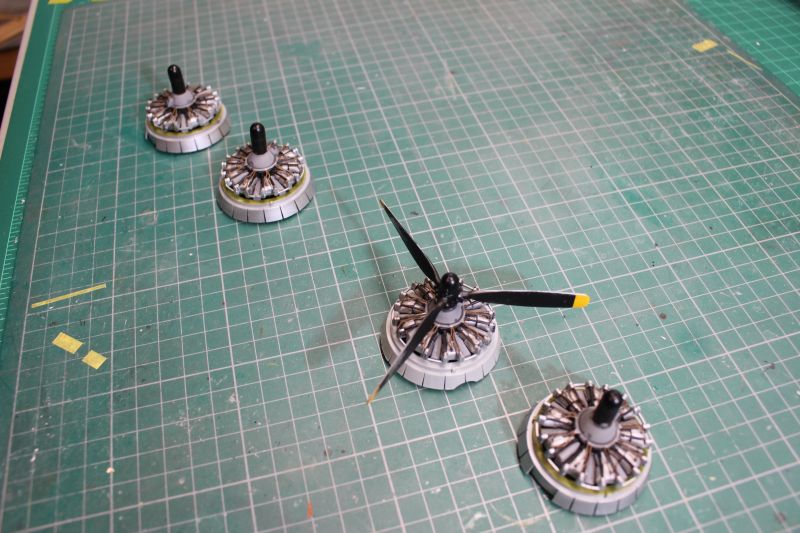
I haven't accomplished much the last couple of days but have fitted the hubs to the engines, In keeping with the method I used on the 109 I cut the hubs in half (to get rid of the blade attachment holes) and substituted aluminum rod cut to size with an "Imp" pipe cutter and then glued the aluminum to the remaining part of the hub, painted it semi gloss black and painted a flat black stripe on each hub (not that that stripe can be seen in these pics) to represent a prop. shadow. I also (being the genius I am ((Wiley Coyote)) attached the wrong cowl flap assembly to No#2 engine. The No#2 should have a cut out in about the 3:30 position for the exhaust pipe, I attached a cowl flap with no cut out! I had to break the cowl flap off and re-fit the correct one. I also painted and weathered the one prop. that will be used on this model.
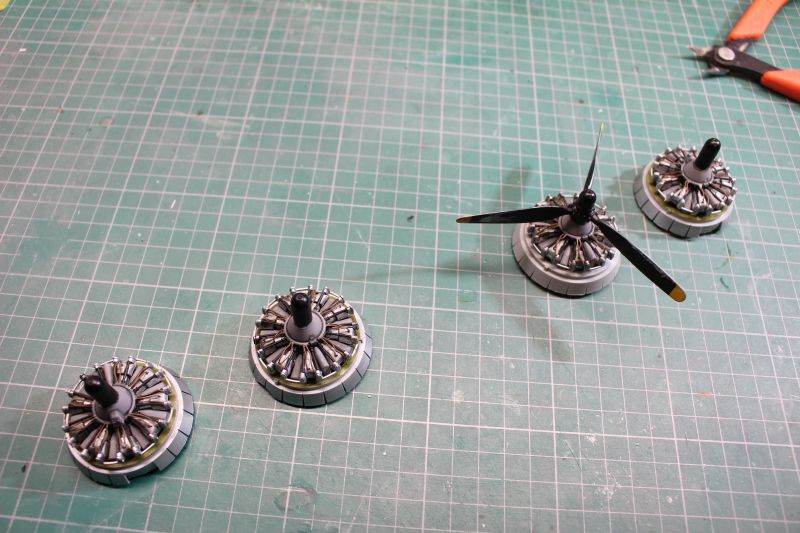
The new cowl flap seen here, unpainted gray.
I haven't accomplished much the last couple of days but have fitted the hubs to the engines, In keeping with the method I used on the 109 I cut the hubs in half (to get rid of the blade attachment holes) and substituted aluminum rod cut to size with an "Imp" pipe cutter and then glued the aluminum to the remaining part of the hub, painted it semi gloss black and painted a flat black stripe on each hub (not that that stripe can be seen in these pics) to represent a prop. shadow. I also (being the genius I am ((Wiley Coyote)) attached the wrong cowl flap assembly to No#2 engine. The No#2 should have a cut out in about the 3:30 position for the exhaust pipe, I attached a cowl flap with no cut out! I had to break the cowl flap off and re-fit the correct one. I also painted and weathered the one prop. that will be used on this model.
The new cowl flap seen here, unpainted gray.

chrispisme
Well-known member
Thanks!
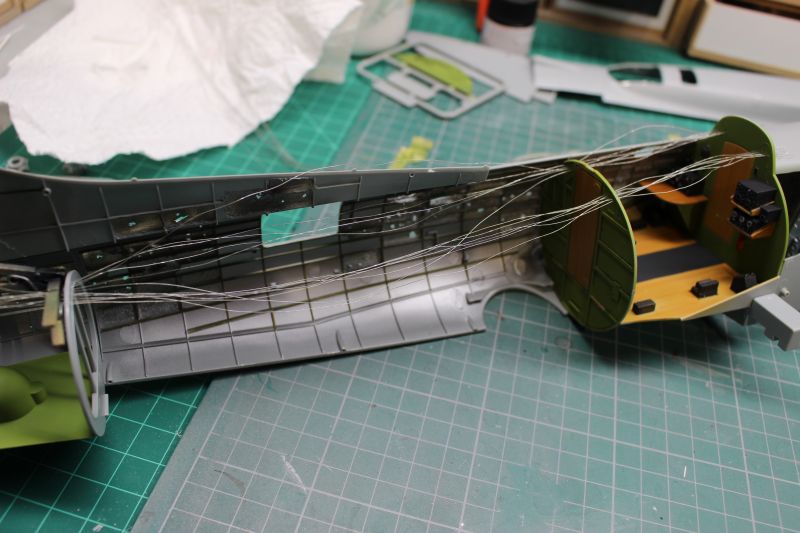
I'm not sure if I'm procrastinating or indeed detail oriented (I'm thinking procrastinating) I decided that if there's going to be any kind of a large tear in the fuselage I should add the control cable runs and perhaps some electrical lines.
I'm test fitting the control cable runs
I'm not sure if I'm procrastinating or indeed detail oriented (I'm thinking procrastinating) I decided that if there's going to be any kind of a large tear in the fuselage I should add the control cable runs and perhaps some electrical lines.
I'm test fitting the control cable runs
Skinny_Mike
Well-known member
Go man go!
Excellent ")
Duke Maddog
Well-known member
Looks good! I think you will need them as there were some serious tears and holes in the waist gun positions where the Germans concentrated much of their fire. Those will truly enhance this model!
Wow, I'm so thrilled to see this come to life! :v
Wow, I'm so thrilled to see this come to life! :v
chrispisme
Well-known member
Thanks for the encouragement!
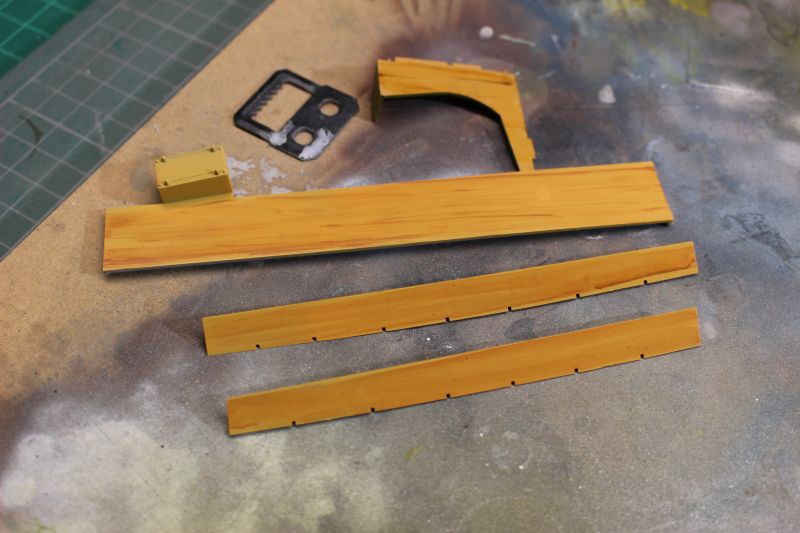
The main assembly cockpit to radio room slipped out of my big stupid hands and suffered a crash landing on the floor causing substantial damage (but repairable) I decided to take a break from the repairs and work on another area. I painted the plywood waste area walkways and weathered them a bit.


Thanks for looking
The main assembly cockpit to radio room slipped out of my big stupid hands and suffered a crash landing on the floor causing substantial damage (but repairable) I decided to take a break from the repairs and work on another area. I painted the plywood waste area walkways and weathered them a bit.
Thanks for looking
chrispisme
Well-known member
Thanks for looking
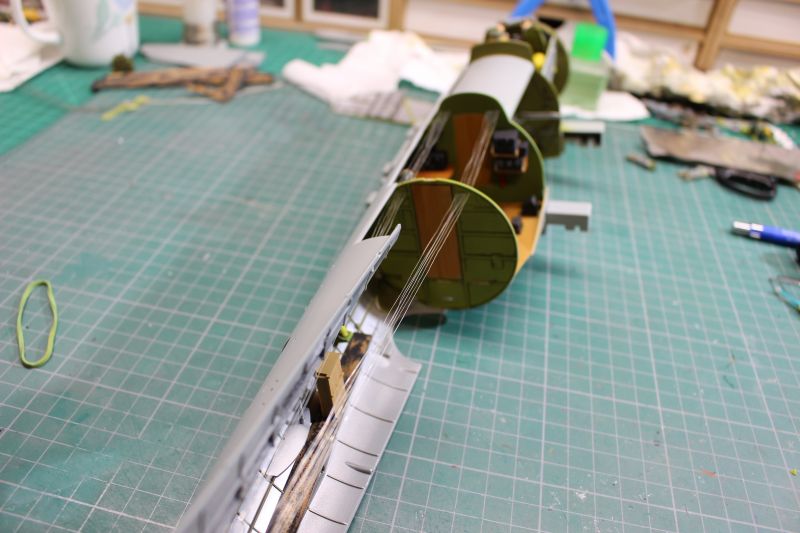
Repairs done and progressing again...until the next time I do something silly
sound insulation panel (radio room) added and control cables glued in as well.

Thanks for looking
Repairs done and progressing again...until the next time I do something silly
sound insulation panel (radio room) added and control cables glued in as well.
Thanks for looking